nginx的安装与配置、使用
安装依赖库sudo yum -y install gcc pcre zlib zlib-devel openssl openssl-devel下载&安装下载页面:http://nginx.org/en/download.html此处的下载版本为:http://nginx.org/downlo
安装依赖库
sudo yum -y install gcc pcre zlib zlib-devel openssl openssl-devel
下载&安装
下载页面:http://nginx.org/en/download.html此处的下载版本为:http://nginx.org/download/nginx-1.10.3.tar.gz
# 下载并解压
wget http://nginx.org/download/nginx-1.10.3.tar.gz
tar -xzvf nginx-1.10.3.tar.gz -C ~/devtools/
# 进入解压目录
cd devtools/nginx-1.10.3/
# 编译
./configure
make
# 安装,因为默认是安装到/usr/local/目录下,需要提升权限
sudo make install
可通过whreeis来查看:
[asahi@localhost nginx-1.10.3]$ whereis nginx
nginx: /usr/local/nginx
进入到/usr/local/nginx目录下,然后启动nginx,
sudo /usr/local/nginx/sbin/nginx
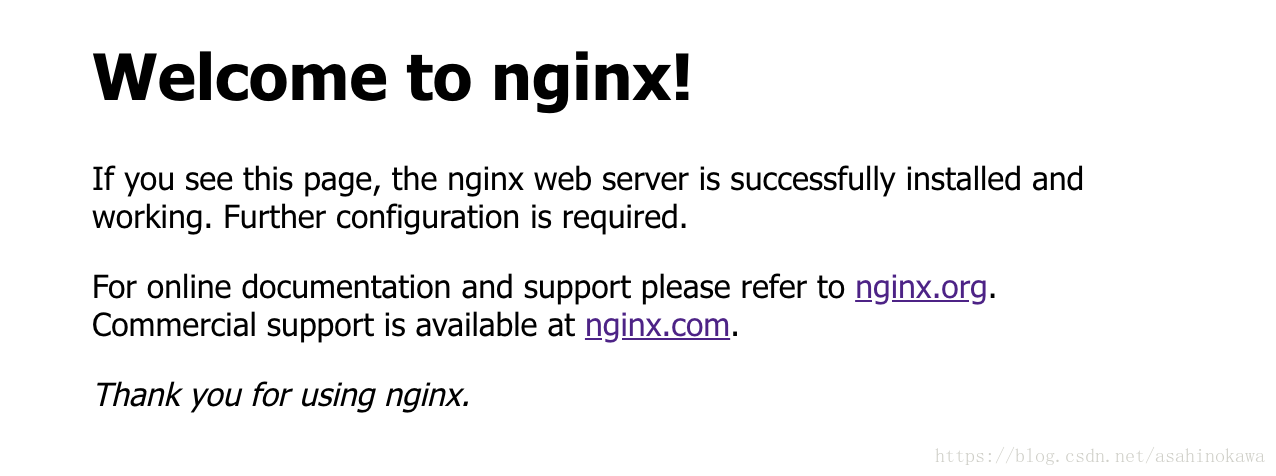
访问得到的页面如下:(如果成功运行后,不能访问,考虑修改防火墙相关设置)
端口转发配置
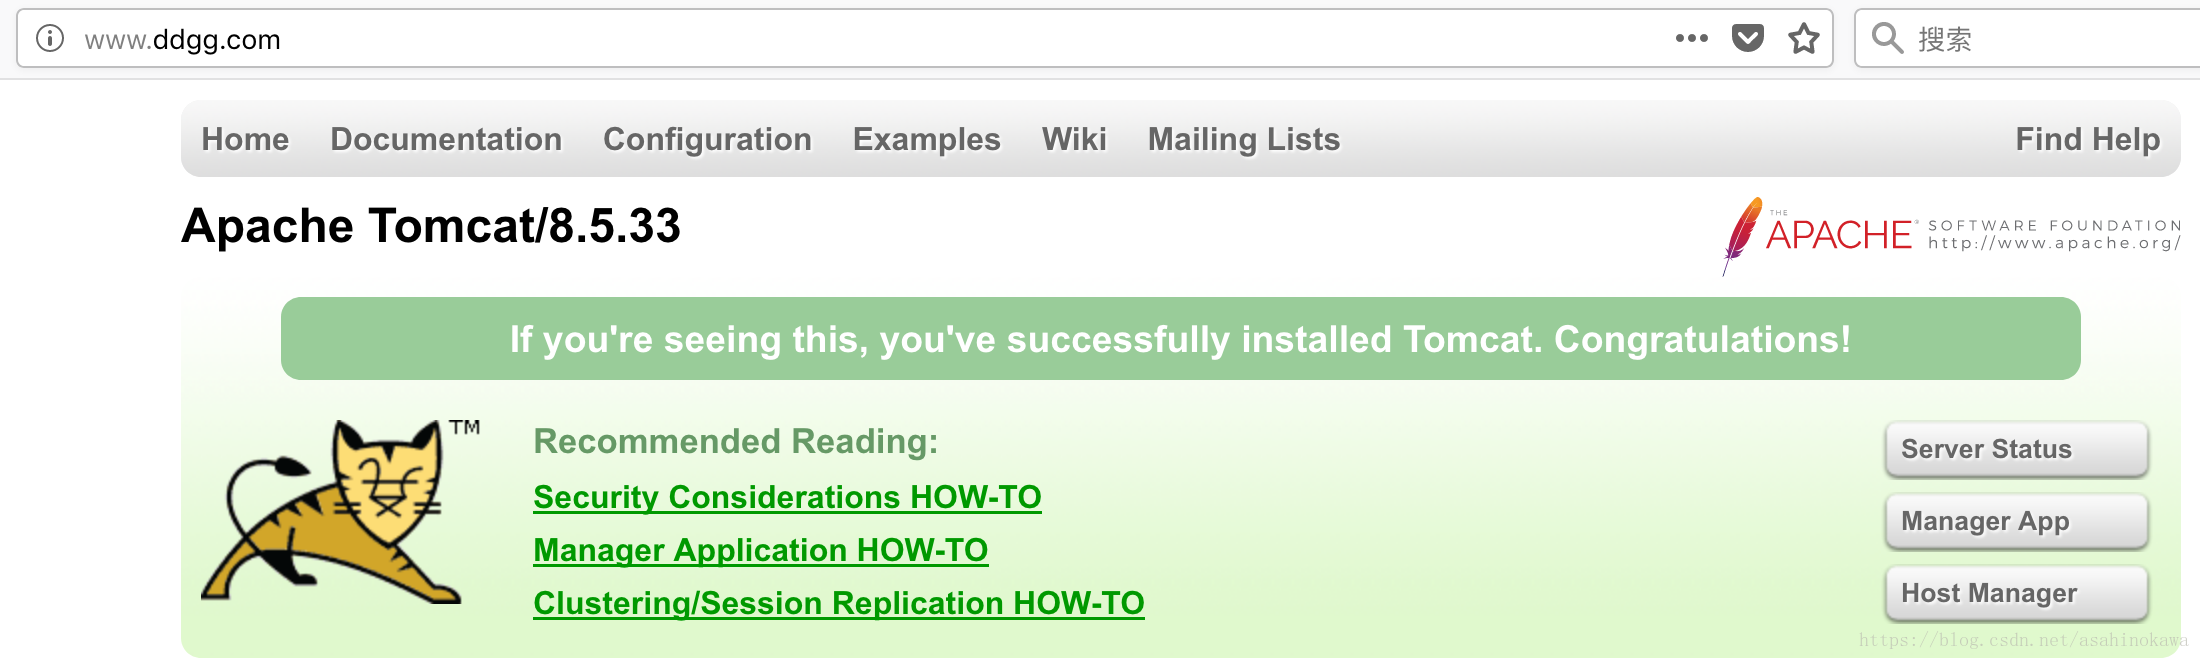
比如说,我想让虚拟机里面占用8080端口的Tomcat的域名编程www.ddgg.com。
首先,我需要在访问这个网址的设备上,将192.168.1.5 www.ddgg.com加入到 hosts 文件中。它的意思就是,如果要访问www.ddgg.com,那么将这个请求发送给 192.168.1.5 这个ip,它知道怎么处理。
注意,这是在宿主机中,非虚拟机中的host!
虚拟机CentOS的80端口将拿到这个请求时。nginx可以做到监听80端口,如果这个请求的服务器为www.ddgg.com,就将请求转发到8080端口,这样就会交给Tomcat来处理,便完成了一种虚拟域名的功能。
首先,在nginx的主目录下,创建一个vhost文件夹,里面放一些端口转发的配置。结构如下:
[asahi@localhost nginx]$ ls vhost
www.ddgg.com.conf
www.ddgg.com.conf 这个配置文件的内容如下:
server {
    listen 80; # 监听80端口
    autoindex on;
    server_name www.ddgg.com; # 如果请求的服务器是www.ddgg.com
    access_log /usr/local/nginx/logs/access.log combined; # log配置
    index index.html index.htm index.jsp index.php;
    #error_page 404 /404.html;
    if ( $query_string ~* ".*[\;'\<\>].*" ) {
        return 404;
   }
   location / {
       proxy_pass http://127.0.0.1:8080; # 就转向本机的8080端口
       add_header Access-Control-Allow-Origin *;
   }
}
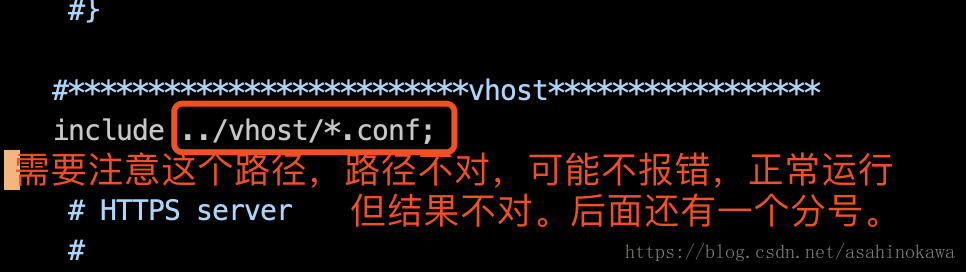
最后,要将上述配置文件加入到nginx的 conf/ningx.conf 配置文件中,需要在其中加上下面的语句:
端口转发结果
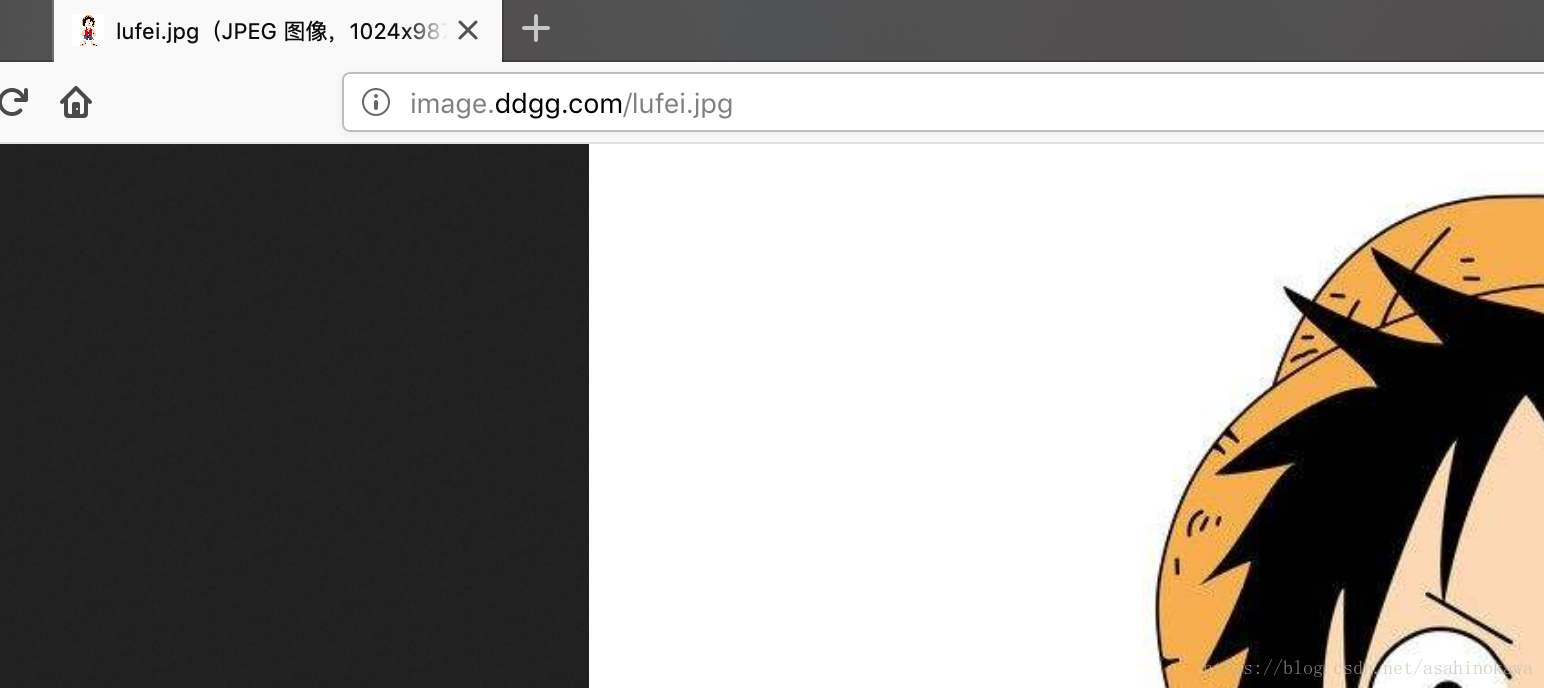
映射到本地文件夹
在vhost文件夹下,新建一个 image.ddgg.com.conf,内容如下:
server {
    listen 80;
    autoindex on;
    server_name image.ddgg.com;
    access_log /usr/local/nginx/logs/access.log combined;
    index index.html index.htm index.jsp index.php;
    #error_page 404 /404.html;
    if ( $query_string ~* ".*[\;'\<\>].*" ) {
        return 404;
   }
   location / {
       root /home/ftpfile/; # 此处指向本地文件夹/home/ftpfile/
       add_header Access-Control-Allow-Origin *;
   }
}
映射结果