4 | Spinnaker orca 如何处理 pipeline 中的制品
处理所在的接口:/orchestrate,位置:OperationsController进入接口后,执行parseAndValidatePipeline(pipeline),最终会调用:ArtifactResolver.resolveArtifacts()。调用栈如下:OperationsContr
处理所在的接口:/orchestrate,位置:OperationsController
进入接口后,执行parseAndValidatePipeline(pipeline),最终会调用:ArtifactResolver.resolveArtifacts()。调用栈如下:
- OperationsController.orchestrate(@RequestBody Map pipeline, HttpServletResponse response)
- OperationsController.planOrOrchestratePipeline(Map pipeline)
- OperationsController.orchestratePipeline(Map pipeline)
- OperationsController.parseAndValidatePipeline(Map pipeline)
- OperationsController.parseAndValidatePipeline(Map pipeline, boolean resolveArtifacts)
- OperationsController.parsePipelineTrigger(ExecutionRepository executionRepository, BuildService buildService, Map pipeline, boolean resolveArtifacts)
在 parsePipelineTrigger() 方法中,调用 artifactResolver?.resolveArtifacts(pipeline)。
各种 Artifact
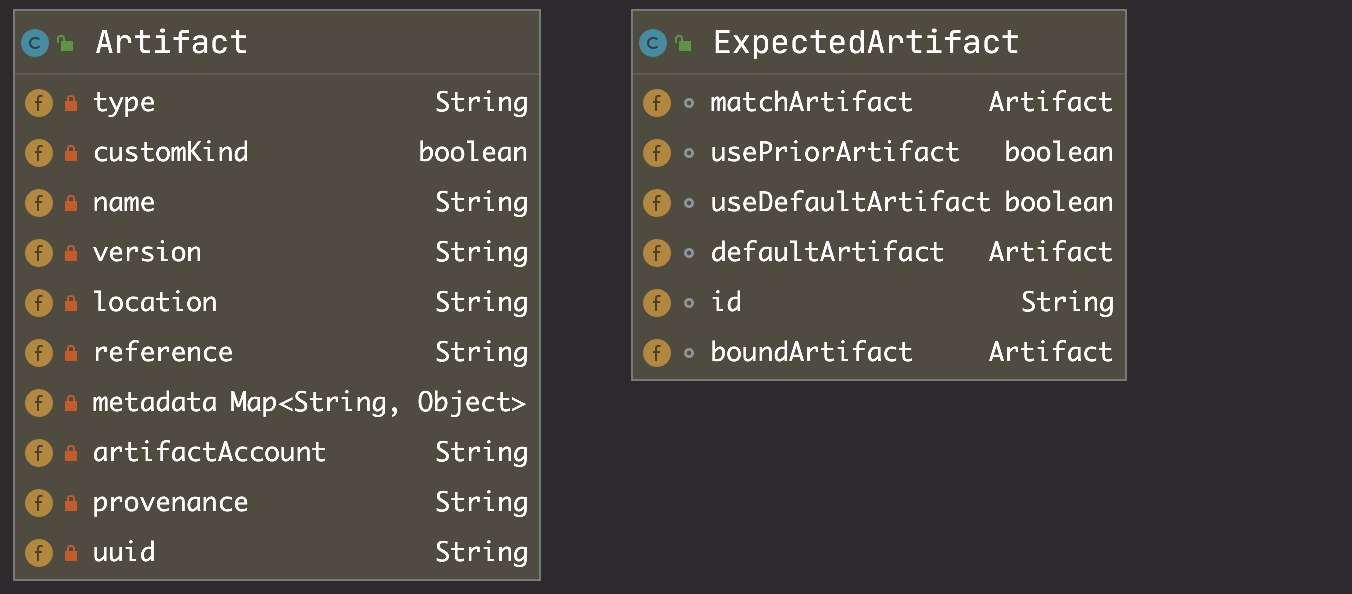
首先,Artifact 的来源是 ExpectedArtifact,它包含一个制品的匹配规则(matchArtifact)、一个默认的制品(defaultArtifact)以及一个绑定制品(boundArtifact,暂不明用途),他们的关系如下所示:
其次,在流水线的 json 配置中的表现形式则为:
{
    "expectedArtifacts": [
    {
      "defaultArtifact": {
        "customKind": false,
        "id": "292e6782-8e60-4bfe-9693-c9f6619daf76"
      },
      "displayName": "black-cat-45",
      "id": "8435f791-fb44-41c3-851d-4334dae63d80",
      "matchArtifact": {
        "artifactAccount": "generic-repo::1",
        "customKind": false,
        "id": "4ddf512b-35df-4672-b315-8c0faf8347eb",
        "name": "codingcorp-generic.pkg.coding.com/adb/generic-repo/curl-time.sh",
        "parentType": "generic",
        "pkgId": 2,
        "pkgName": "curl-time.sh",
        "projectId": 2,
        "projectName": "adb",
        "repoName": "generic-repo",
        "type": "coding_artifact/generic",
        "uriName": "adb"
      },
      "useDefaultArtifact": false,
      "usePriorArtifact": false
    }
  ]
}
接着,看代码中所定义的几种制品,
expectedArtifacts
此处的解析如上文所述,包含匹配规则、默认制品以及绑定制品。
receivedArtifactsFromPipeline
取自 receivedArtifacts 字段,顾名思义,它是上个 pipeline 中产生的制品。它的设置在请求到达 orca 前,就已经完成,即在 echo 的 MannualEventHandler.buildTrigger() 方法中已经处理完成。
处理的逻辑就是将 Trigger 中所携带的制品,添加到 pipeline 的 receivedArtifacts 字段中。
artifactsFromTrigger
此处的 artifact 来自 trigger,应该是被包含在 pipeline.receivedArtifacts 中,即被 receivedArtifactsFromPipeline 所包含。
trigger = pipeline.get("trigger");
artifactsFromTrigger = trigger.get("artifacts");
receivedArtifacts
为 artifactsFromTrigger 与 receivedArtifactsFromPipeline 并集并去重。
List<Artifact> receivedArtifacts =
        Stream.concat(receivedArtifactsFromPipeline.stream(), artifactsFromTrigger.stream())
            .distinct()
            .collect(toList())
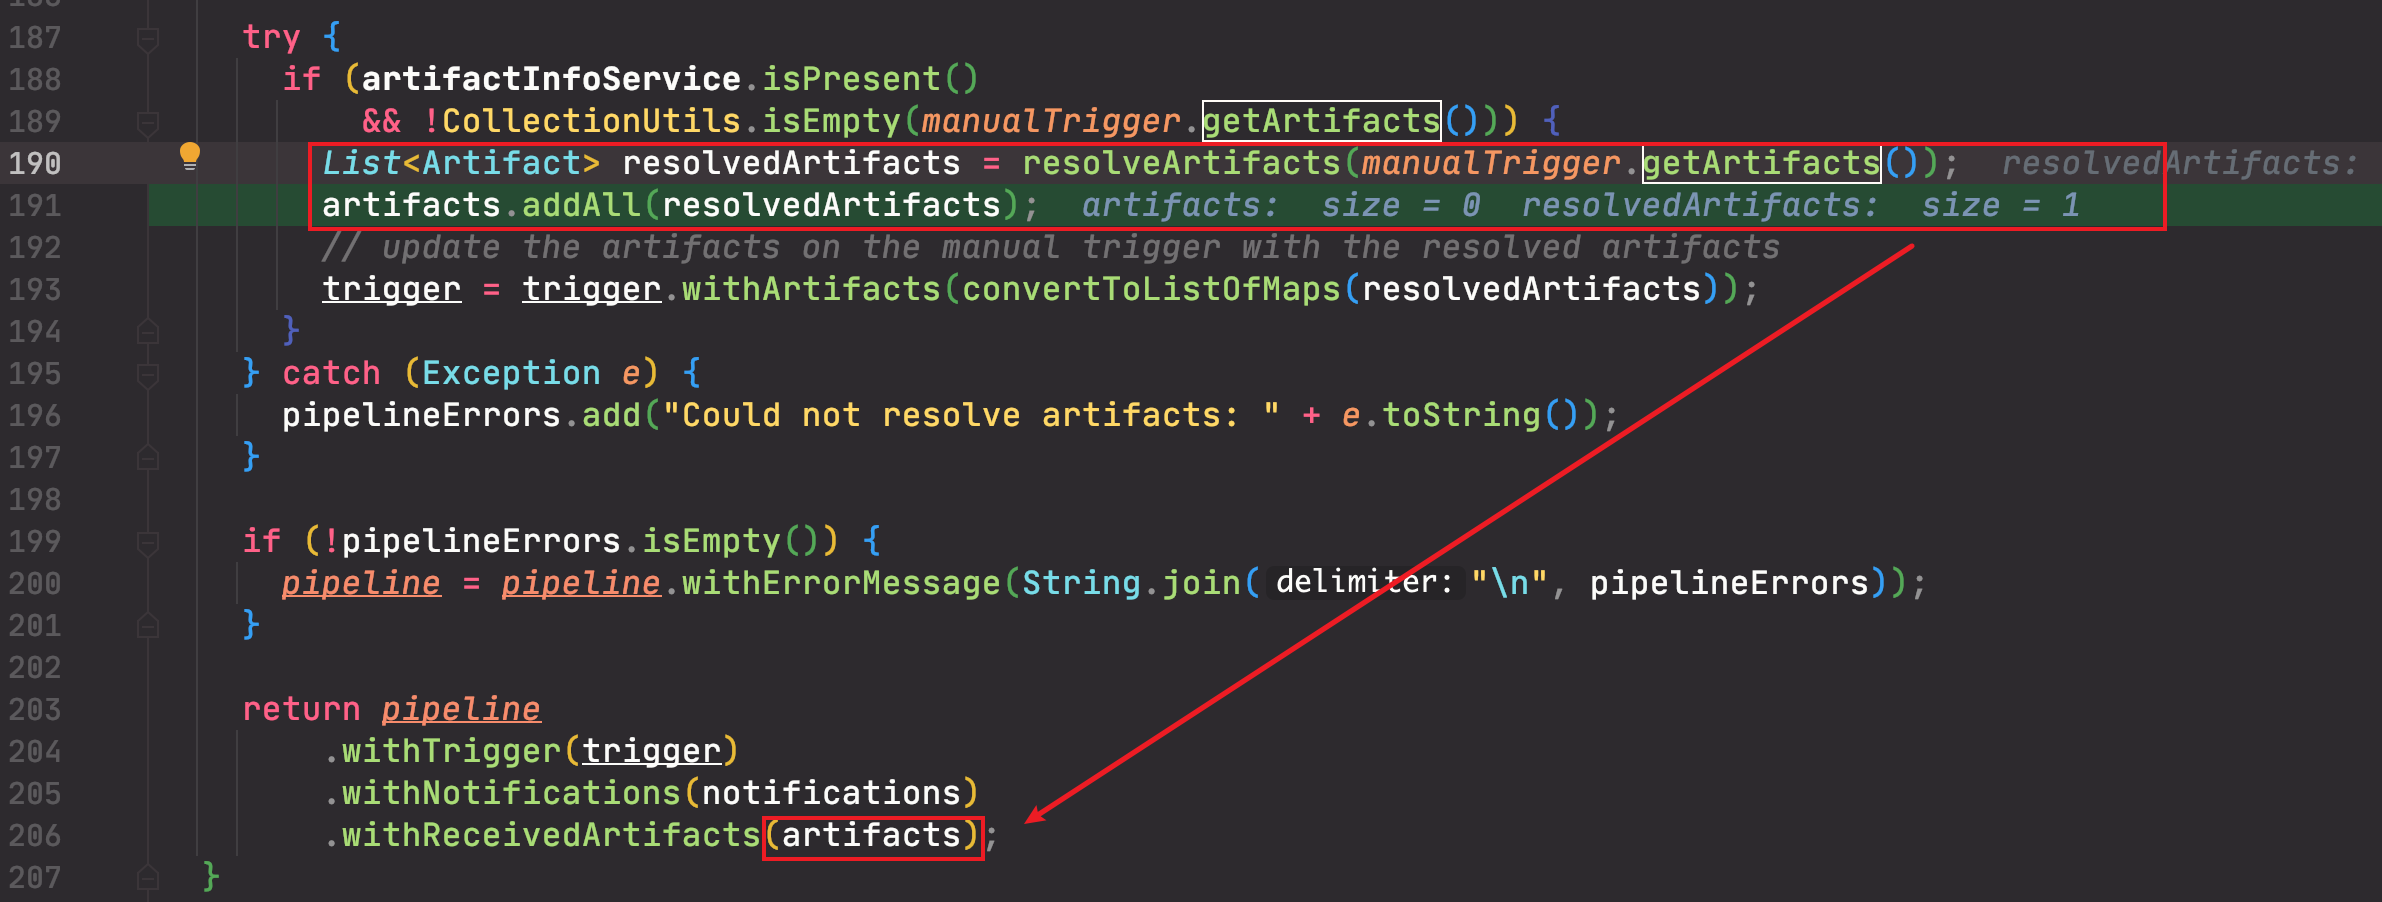
经过上面的处理后,trigger 里面的 artifacts 就别替换成了 receivedArtifacts。
priorArtifacts
主是各个 stage 的 output 字段中,所记录的 artifacts,也就是其他阶段产生的制品。如果 includeTrigger 标志位 true,则还会加入 trigger 中的制品。所以,它是 trigger + 其他阶段所产生制品的总和。
resolvedArtifacts
即进行制品规则匹配后,符合条件的制品。它的处理逻辑为:
LinkedHashSet<Artifact> resolvedArtifacts =
        resolveExpectedArtifacts(expectedArtifacts, receivedArtifacts, priorArtifacts, true);
之后,便会为每一个 expectedArtifact 进行制品匹配,也即如下:
public Artifact resolveSingleArtifact(
    ExpectedArtifact expectedArtifact,
    List<Artifact> possibleMatches,
    List<Artifact> priorArtifacts,
    boolean requireUniqueMatches) {
  Artifact resolved =
      matchSingleArtifact(expectedArtifact, possibleMatches, requireUniqueMatches);

  if (resolved == null && expectedArtifact.isUsePriorArtifact() && priorArtifacts != null) {
    resolved = matchSingleArtifact(expectedArtifact, priorArtifacts, requireUniqueMatches);
    expectedArtifact.setBoundArtifact(resolved);
  }

  if (resolved == null
      && expectedArtifact.isUseDefaultArtifact()
      && expectedArtifact.getDefaultArtifact() != null) {
    resolved = expectedArtifact.getDefaultArtifact();
    expectedArtifact.setBoundArtifact(resolved);
  }

  return resolved;
}
上面的代码逻辑分三步,匹配失败的时候,进入下一步骤:
- 优先使用 receivedArtifacts 去匹配制品。
- 次优使用 priorArtifacs 去匹配制品。
- 如果上面都没有匹配上,最后再使用默认制品(前提:isUseDefaultArtifact 开关开启,并配置了默认制品)。
其中 所期望制品 与 **能拿到的制品 **的匹配逻辑为:
private Artifact matchSingleArtifact(
    ExpectedArtifact expectedArtifact,
    List<Artifact> possibleMatches,
    boolean requireUniqueMatches) {
  if (expectedArtifact.getBoundArtifact() != null) {
    return expectedArtifact.getBoundArtifact();
  }
  expectedArtifact
      .getMatchArtifact()
      .setType(".*" + expectedArtifact.getMatchArtifact().getType());

  if (!StringUtils.isEmpty(expectedArtifact.getMatchArtifact().getVersion())) {
    expectedArtifact
        .getMatchArtifact()
        .setVersion(".*" + expectedArtifact.getMatchArtifact().getVersion());
  }

  List<Artifact> matches =
      possibleMatches.stream().filter(expectedArtifact::matches).collect(toList());
  Artifact result;
  switch (matches.size()) {
    case 0:
      return null;
    case 1:
      result = matches.get(0);
      break;
    default:
      if (requireUniqueMatches) {
        throw new InvalidRequestException(
            "Expected artifact " + expectedArtifact + " matches multiple artifacts " + matches);
      }
      result = matches.get(0);
  }

  expectedArtifact.setBoundArtifact(result);
  return result;
}
- 没填写版本、类型的匹配规则,被设置为
.*,后面会被当做正则表达式使用,即匹配所有。 - 只能有一个制品,才能匹配成功
- 匹配成功后,将匹配所得的制品,塞到 expectedArtifact 的 boundArtifact 中。
其中,如何才能算得上匹配,其实就是对比 传入的Artifacts 的各个属性(type, name, version, reference)是否符合正则表达,即:
public boolean matches(Artifact other) {
  String thisType = matchArtifact.getType();
  String otherType = other.getType();
  if (!matches(thisType, otherType)) {
    return false;
  }
// ...
  return true;
}

private boolean matches(String us, String other) {
  return StringUtils.isEmpty(us) || (other != null && patternMatches(us, other));
}

private boolean patternMatches(String us, String other) {
  return Pattern.compile(us).matcher(other).matches();
}
allArtifacts
resolvedArtifacts + receivedArtifacts
经过上面的处理后,trigger 中的各项 artifacts 会被更新:
- artifacts -> allArtifacts
- expectedArtifacts -> expectedArtifacts
- resolvedExpectedArtifacts -> expectedArtifacts
至此,orca 在开启流水线之前的制品匹配,已经处理完成。
