1
2
3
4
| slmgr /upk
slmgr /ipk W269N-WFGWX-YVC9B-4J6C9-T83GX
slmgr /skms kms.loli.beer
slmgr /ato
|
搭建流程
下载压缩包
wget https://github.com/Wind4/vlmcsd/releases/download/svn1112/binaries.tar.gz
解压
tar -xzvf binaries.tar.gz
进入解压得到的目录,如下:
1
2
3
4
5
6
7
8
9
10
11
12
13
14
15
16
17
18
19
20
21
22
23
24
25
26
27
28
29
30
31
32
33
34
| ➜ binaries tree -L 2
.
|-- Android
| |-- arm
| |-- intel
| `-- mips
|-- DragonFly
| `-- intel
|-- FreeBSD
| `-- intel
|-- Hurd
| `-- intel
|-- Linux
| |-- arm
| |-- intel
| |-- mips
| |-- ppc
| |-- s390
| `-- sparc
|-- MacOSX
| |-- intel
| `-- ppc
|-- Minix
| `-- intel
|-- NetBSD
| `-- intel
|-- OpenBSD
| `-- intel
|-- Solaris
| `-- intel
|-- Windows
| `-- intel
`-- iOS
`-- arm
|
根据系统类型,选择相应系统,然后选择进入相应CPU架构的目录,这里是进入Linux/Intel目录。
查看系统类型:uname,如下:
查看CPU相关参数:cat /proc/cpuinfo,如下:
1
2
3
4
5
6
7
8
9
10
11
12
13
14
15
16
17
18
19
20
21
22
23
24
25
26
27
| ➜ binaries cat /proc/cpuinfo
processor : 0
vendor_id : GenuineIntel
cpu family : 6
model : 63
model name : Intel(R) Xeon(R) CPU E5-2676 v3 @ 2.40GHz
stepping : 2
microcode : 0x3d
cpu MHz : 2399.964
cache size : 30720 KB
physical id : 0
siblings : 1
core id : 0
cpu cores : 1
apicid : 0
initial apicid : 0
fpu : yes
fpu_exception : yes
cpuid level : 13
wp : yes
flags : fpu vme de pse tsc msr pae mce cx8 apic sep mtrr pge mca cmov pat pse36 clflush mmx fxsr sse sse2 ht syscall nx rdtscp lm constant_tsc rep_good nopl xtopology cpuid pni pclmulqdq ssse3 fma cx16 pcid sse4_1 sse4_2 x2apic movbe popcnt tsc_deadline_timer aes xsave avx f16c rdrand hypervisor lahf_lm abm cpuid_fault invpcid_single pti fsgsbase bmi1 avx2 smep bmi2 erms invpcid xsaveopt
bugs : cpu_meltdown spectre_v1 spectre_v2 spec_store_bypass l1tf
bogomips : 4800.06
clflush size : 64
cache_alignment : 64
address sizes : 46 bits physical, 48 bits virtual
power management:
|
进入static目录,如下:
1
2
3
4
5
6
7
8
9
10
| ➜ static ls -l
total 852
-rwxr-xr-x 1 ubuntu ubuntu 97115 Oct 20 2018 vlmcs-x64-musl-static
-rwxr-xr-x 1 ubuntu ubuntu 94488 Oct 20 2018 vlmcs-x86-musl-static
-rwxr-xr-x 1 ubuntu ubuntu 93051 Oct 20 2018 vlmcsd-x64-musl-static
-rwxr-xr-x 1 ubuntu ubuntu 92344 Oct 20 2018 vlmcsd-x86-musl-static
-rwxr-xr-x 1 ubuntu ubuntu 92760 Oct 20 2018 vlmcsd-x86-musl-static-threads
-rwxr-xr-x 1 ubuntu ubuntu 130363 Oct 20 2018 vlmcsdmulti-x64-musl-static
-rwxr-xr-x 1 ubuntu ubuntu 129912 Oct 20 2018 vlmcsdmulti-x86-musl-static
-rwxr-xr-x 1 ubuntu ubuntu 129912 Oct 20 2018 vlmcsdmulti-x86-musl-static-threads
|
没有运行权限的加个运行权限:sudo chmod +x vlmcsd-x64-musl-static
运行服务:nohup ./vlmcs-x64-musl-static
激活流程
打开cmd/powershell(管理员)直接输入下列命令:
1
2
3
4
5
6
7
8
9
10
11
12
13
14
15
16
17
| # 卸载产品密钥
slmgr /upk
# 配置系统序列号
slmgr /ipk W269N-WFGWX-YVC9B-4J6C9-T83GX #不同系统版本这里的激活码不一样
# 配置KMS服务器地址
slmgr /skms 13.231.43.2xx
# 激活系统
slmgr /ato
# 查看系统激活到期时间
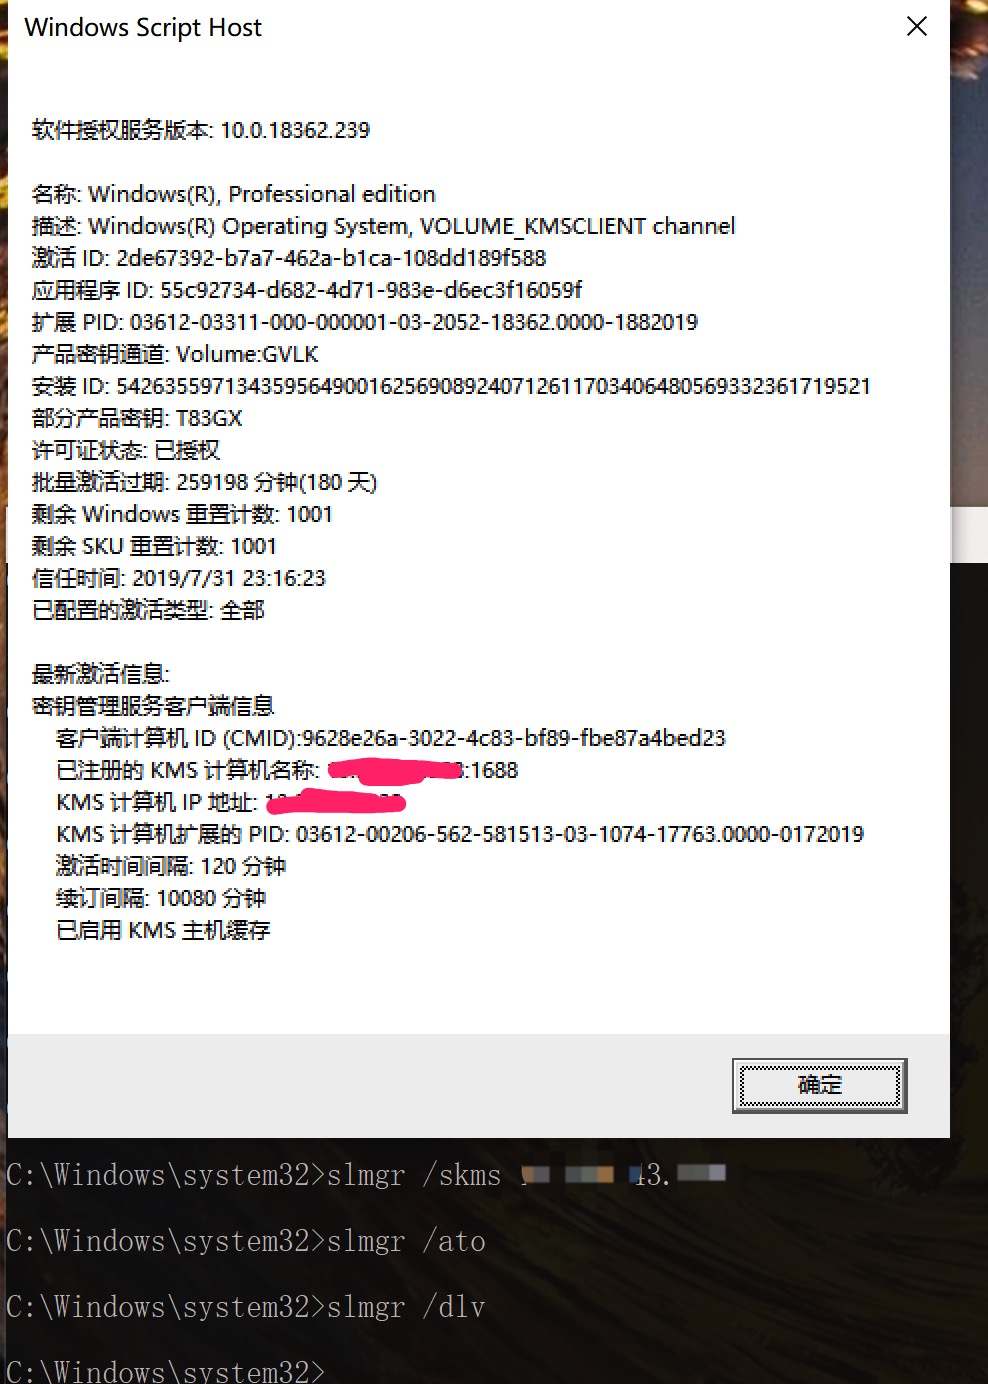
slmgr /xpr
#查看授权详细信息
slmgr /dlv
|
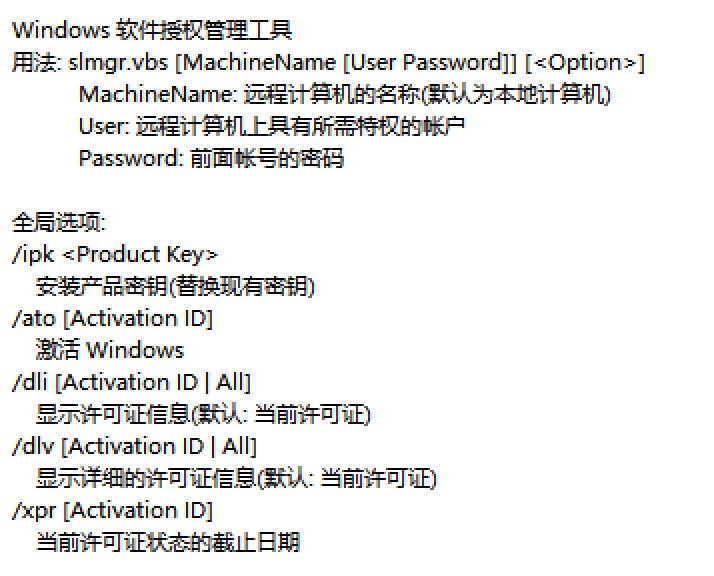
关于slmgr命令的详细参数说明,可在cmd/powershell中输入slmgr后直接点击回车,就会出现详细说明

不同版本系统的激活码一览表
| 操作系统版本 |
KMS客户端设置密钥 |
| Windows 10 专业版 |
W269N-WFGWX-YVC9B-4J6C9-T83GX |
| Windows 10 专业N版 |
MH37W-N47XK-V7XM9-C7227-GCQG9 |
| Windows 10 企业版 |
NPPR9-FWDCX-D2C8J-H872K-2YT43 |
| Windows 10 企业N版 |
DPH2V-TTNVB-4X9Q3-TJR4H-KHJW4 |
| Windows 10 教育(家庭)版 |
NW6C2-QMPVW-D7KKK-3GKT6-VCFB2 |
| Windows 10 教育(家庭)N版 |
2WH4N-8QGBV-H22JP-CT43Q-MDWWJ |
| Windows 10 企业版2015 LTSB |
WNMTR-4C88C-JK8YV-HQ7T2-76DF9 |
| Windows 10 企业版 2015 LTSB N |
2F77B-TNFGY-69QQF-B8YKP-D69TJ |
| Windows 10 企业版 2016 LTSB |
DCPHK-NFMTC-H88MJ-PFHPY-QJ4BJ |
| Windows 10 企业版 2016 LTSB N |
QFFDN-GRT3P-VKWWX-X7T3R-8B639 |
完结 撒花!


